Making a Pottery Teapot: An Intermediate Project Explained
The teapot is one of pottery’s most satisfying challenges. It asks you to throw multiple separate components, join them together with confidence, and produce something that actually functions well — pours cleanly, holds its lid, and sits on a table without wobbling. For anyone who has spent time learning the basics of wheel throwing, a teapot represents a genuinely exciting step forward. Yes, it is more complex than a mug or a bowl. But it is absolutely within your reach, and this guide will walk you through every stage of the process so that nothing catches you off guard.
Before you panic at the word “intermediate,” take a breath. This project is called intermediate not because it is reserved for some elite group of potters, but simply because it combines several skills you have likely already been practising separately. If you can throw a consistent cylinder, pull walls with reasonable control, and have had a go at trimming, you are ready. The teapot simply asks you to do those things in sequence and with a bit more patience. That is all.
Understanding What a Teapot Actually Is
A teapot is made up of several distinct parts: the body, the lid, the spout, and the handle. Each of these is made separately and then assembled. This is important to understand from the outset, because it changes how you plan your making session. You are not sitting down to throw one pot. You are sitting down to throw a family of components that need to work together — in proportion, in weight, and in fit.
The body holds the tea. The lid needs to fit snugly into or onto a gallery (a small ledge thrown into the rim of the body). The spout must be attached at a height that allows the teapot to be filled without tea leaking out through it, and it needs to be angled and shaped so it pours cleanly. The handle — whether pulled, extruded, or coil-built — must be strong enough to support a full pot of hot liquid and positioned so the teapot balances comfortably in the hand.
Getting all of this right the first time is unlikely. Getting it mostly right the first time is entirely possible. And with each attempt, your understanding of how these parts relate to each other will deepen in a way that no amount of reading can replicate.
Clay Selection and Preparation
For a teapot, you want a clay body that is smooth enough to throw cleanly but has enough tooth to hold its shape when you are attaching components. A standard stoneware clay works beautifully for beginners taking on this project. Many UK potters use clays from suppliers such as Potclays in Staffordshire, Valentine Clays in Stoke-on-Trent, or Bath Potters’ Supplies. All three offer reliable stoneware bodies that are well-suited to functional ware.
Wedge your clay thoroughly before you begin. This is not optional. Air pockets in your clay can cause cracking during drying or, worse, an explosion in the kiln. Spiral wedging is the most efficient method once you have got the hang of it, but ram’s head wedging works just as well if that is what you are comfortable with. Aim to wedge each piece of clay for at least fifty turns. Your clay should feel uniform throughout — no soft spots, no hard patches, no visible bubbles when you cut through it with a wire.
For a medium-sized teapot (one that holds roughly 500ml to 700ml, which is standard for two to three cups), you will need approximately the following weights of clay:
- Body: 500g to 700g
- Lid: 150g to 200g
- Spout: 100g to 150g
- Handle: 100g to 150g (if pulled directly from a lump)
Weigh these portions out before you begin so you are not guessing mid-session. It is a small thing that makes an enormous difference to how consistently your components relate to one another.
Throwing the Body
Centre your clay firmly and open it to a depth that leaves about 1cm of clay at the base. Pull your walls up into a slightly rounded, vessel-like form — not too tall, not too squat. Think of the classic teapot silhouette: a generous belly that narrows slightly toward the top. This shape is not just aesthetic; it allows tea to steep well and makes it easier to attach the spout at the correct angle later.
As you near the end of throwing, you need to create the gallery. This is the ledge on which your lid will sit. To create it, use a wooden tool or a rib to compress the inner rim of the pot outward, then use your finger and thumb to create a small horizontal shelf just below the opening. The gallery needs to be level, smooth, and wide enough to support the lid flange without being so wide that the lid rattles around. Measure the diameter of your gallery with calipers and write it down — you will need this measurement when you throw the lid.
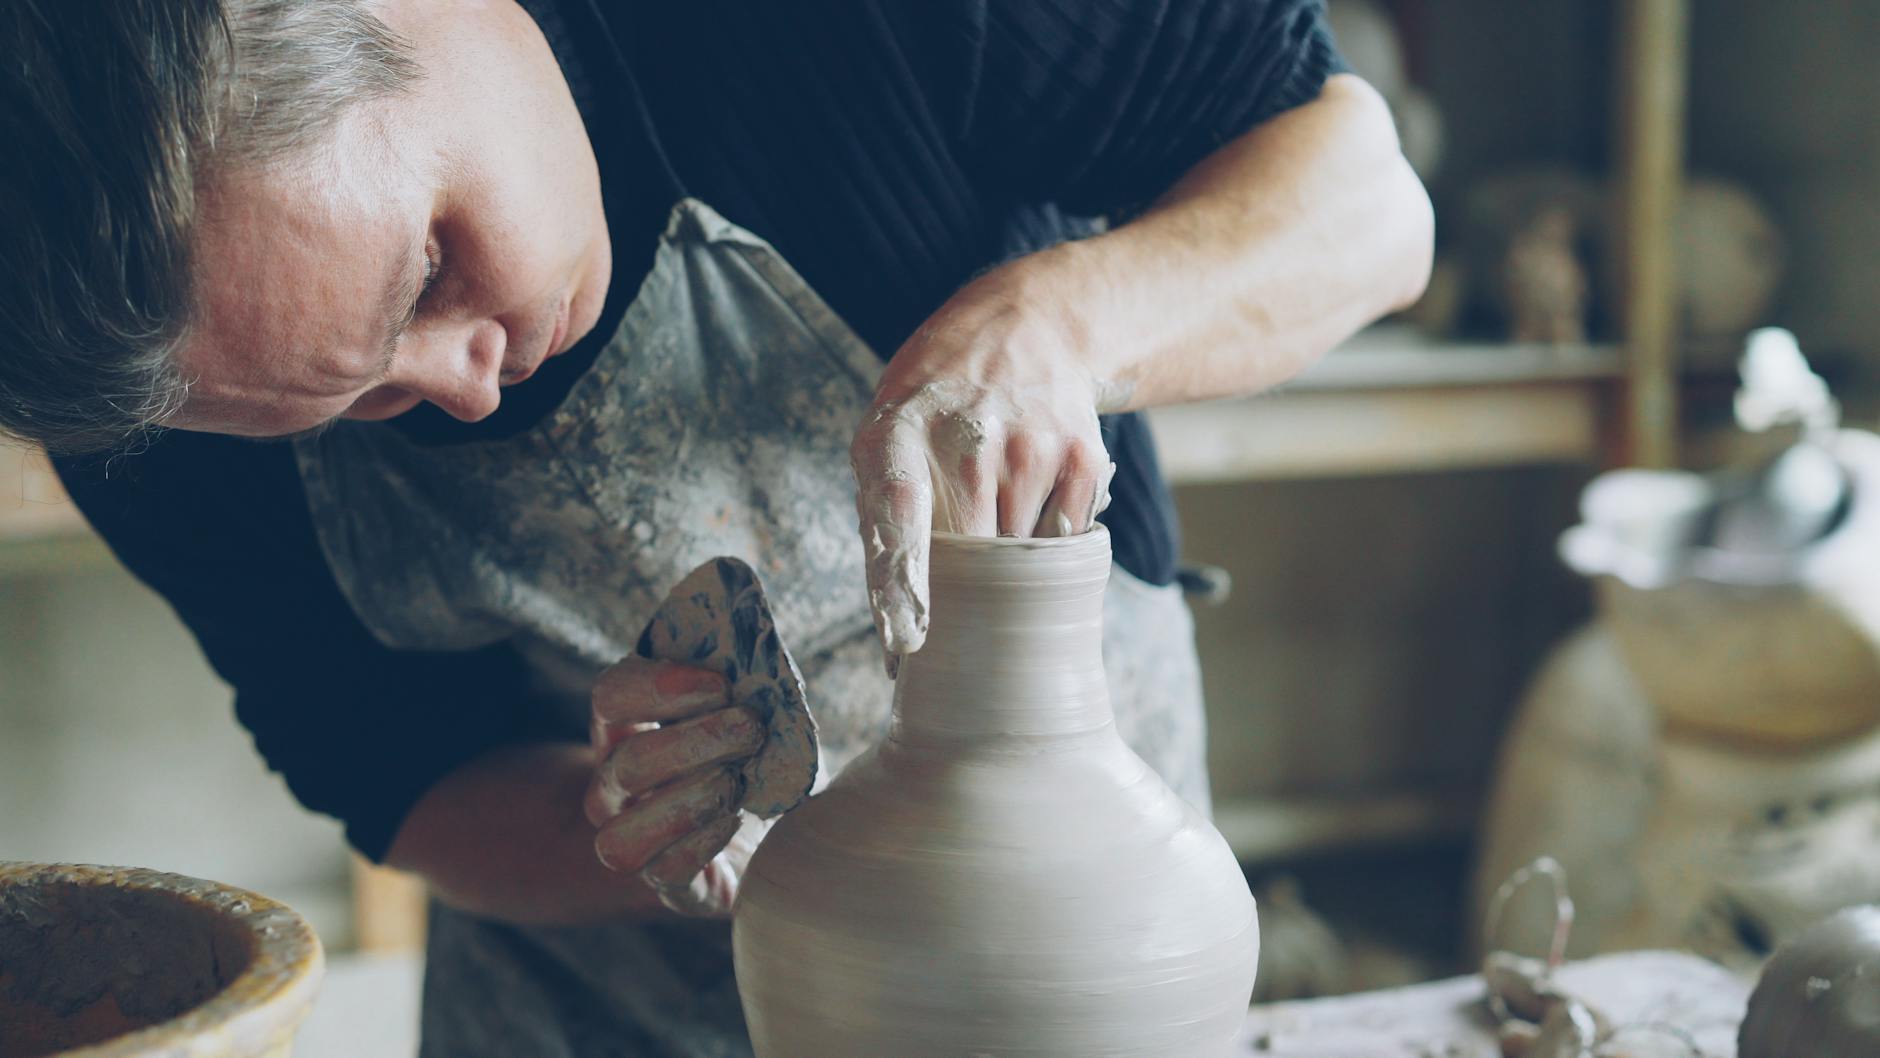
Leave the body on the wheel head or bat to stiffen slightly before you attempt to trim it. A soft body will distort when handled. Leather-hard clay — firm to the touch but not bone dry — is ideal for trimming and attaching components.
Throwing the Lid
There are several styles of teapot lid, but the most forgiving for beginners is the flange lid — one that sits inside the gallery rather than resting on top of it. This style is more secure (it is less likely to fall off when you pour) and slightly easier to fit accurately.
Throw the lid upside down as a small, shallow dome. Pull a short flange downward from the outer edge of the lid — this is the part that will drop inside the gallery of your teapot body. Using the caliper measurement you took from the gallery, check the fit of the flange carefully. The flange should slide into the gallery smoothly but without significant play. Too tight and it will crack during firing; too loose and your lid will clatter about.
Add a knob to the centre of the lid. This can be as simple as a small pinched ball of clay scored and slipped onto the surface, or you can throw a tiny knob directly from the lid while it is still on the wheel. Keep it proportionate — a knob that is too large looks clumsy and throws off the visual balance of the whole pot.
Throwing the Spout
The spout is thrown as a small, narrow cone or cylinder that tapers toward the tip. Centre a small ball of clay and open it very slightly, then pull the walls up into a cone shape, keeping the walls as even as possible. The base of the spout (where it will attach to the body) should be wider than the tip. The tip of the spout, once trimmed and cut, should have an opening of around 8mm to 10mm for a good pour.
Once the spout is leather-hard, trim the base at an angle so that it will sit flush against the curved surface of the teapot body. This is where a lot of beginners struggle, because the curve of the body means that a flat-cut spout will never sit correctly. Hold your spout up against the body before cutting and trace the curve with a pencil. Cut along that line and then refine the fit by gently scraping with a trimming tool until the spout base sits snugly against the body without gaps.
Making the Handle
Pulled handles are traditional, strong, and very satisfying once you get the technique right. To pull a handle, take a thick sausage of clay, wet your hand, and draw your fingers down the clay repeatedly, pulling it longer and thinner with each pass. You are looking for a strap of even thickness with slightly tapered ends. Lay the pulled strap over a curved surface (a rolling pin works well) and allow it to stiffen to a firm-but-flexible state before attaching it.
If pulling a handle feels too ambitious right now, a thick coil of clay, smoothed and shaped, works perfectly well. Do not let anyone make you feel that a coil handle is inferior — plenty of excellent potters use them regularly.
Assembling the Teapot
Assembly is the stage that requires the most care and patience. Work with all components at a similar state of leather-hardness. If one piece is much wetter than the others, it will shrink at a different rate during drying and the join will crack.
Follow these steps in order:
- Mark the position of the spout on the body with a pencil. It should sit about two-thirds of the way up the body, angled upward so the tip is above the maximum fill line (which is roughly the base of the gallery).
- Use a sharp tool or a small drill bit to pierce a cluster of holes in the body where the spout will attach. These holes allow tea to flow into the spout. Make at least seven or eight holes and keep them close together inside the area that will be covered by the spout base.
- Score both the base of the spout and the area of the body around the holes using a serrated tool or fork. Apply a generous amount of slip to both surfaces. Slip is simply clay mixed with water to a thick, creamy consistency — ideally made from the same clay body you are using.
- Press the spout firmly onto the body and smooth the join from the outside, blending the clay together so there is no visible seam. Support the interior of the body wall with your fingers as you do this to avoid distorting the body.
- Score and slip the handle attachment points on the body. The top attachment should sit just below the gallery and the bottom attachment should be about two-thirds of the way down the body, roughly level with the spout. Press the handle firmly into place and smooth both joins.
- Check that the handle, spout, and knob are all aligned on the same vertical axis. Stand the pot at eye level and look at it head-on. Misalignment at this stage is easy to
fix and very difficult to correct once the clay has dried. Adjust the position of any element by gently pressing and re-smoothing before the clay stiffens. Once you are satisfied with the alignment, set the assembled teapot aside on a board in a cool, draught-free spot and allow it to firm up slowly to the leather-hard stage. Cover it loosely with plastic sheeting to slow the drying and reduce the risk of cracking, particularly at the joins.
When the teapot has reached leather-hard, you can refine the surface with a metal kidney or a damp sponge. Tidy up any tool marks around the spout and handle joins, and compress the clay gently to consolidate the walls. This is also the moment to add any decorative detail — a sprigged motif, a combed line around the shoulder, or a simple impressed pattern — before the clay becomes too dry to accept surface work. Test the lid fit at this stage too. The lid should drop into the gallery with a small amount of play, not a tight fit, as the clay will continue to shrink slightly during the remainder of drying and again during firing. If the fit is already snug at leather-hard, pare back the gallery wall carefully with a turning tool.
Once fully dry — bone dry, meaning the clay feels cool to the touch and shows no darker patches of moisture — the teapot is ready for its bisque firing. Fire slowly up to around 1000°C to drive off all remaining water and organic material from the clay body. After bisque firing, apply your chosen glaze, taking care to wax or scrape the inside of the spout and the underside of the lid flange to keep those surfaces clean and ensure a good fit after glost firing. Glaze the interior of the pot thoroughly, as an unglazed interior will remain porous and absorb liquid over time.
Making a teapot is one of the more demanding projects a potter can undertake at the intermediate stage, requiring the coordination of several separately made components that must all fit and function together. The process rewards patience and careful measurement at every step. A teapot that pours cleanly, holds its lid securely, and sits level on a table is a genuinely satisfying object to produce, and each one made builds the practical understanding that makes the next one better.