Introduction to the Potter’s Wheel
There is a moment, usually about ten minutes into your first pottery class, when the clay does something completely unexpected. It lurches sideways, folds in on itself, or simply collapses in a wet, grey heap. And you look at your hands – covered in slip, slightly cold, thoroughly confused – and you wonder whether this was a terrible idea. It was not. That moment of chaos is, in fact, exactly where every potter begins. The wheel is humbling, and that is part of what makes it so rewarding.
Wheel throwing is one of the most tactile, absorbing crafts you can take up. Unlike many hobbies that reward patience and precision from the very start, pottery on the wheel rewards something slightly different: a willingness to feel. You learn through your hands before your head catches up. Concepts like centring, opening, and pulling walls make very little sense as instructions – but they become instinctive over time, and the progress you feel from one session to the next is genuinely noticeable.
This guide is written for complete beginners based in the UK. Whether you have signed up for your first evening class in Manchester, spotted a local studio in Edinburgh, or you are thinking about investing in your own wheel at home, this article will walk you through the essentials: what the wheel actually does, how to centre clay, the basic stages of throwing a cylinder, and how to set yourself up for success from the very beginning.
Understanding the Potter’s Wheel
A potter’s wheel is, at its core, a rotating horizontal disc – called the wheelhead – powered either by a foot pedal (on an electric wheel) or by a kick mechanism (on a traditional kick wheel). Most beginners in the UK will start on an electric wheel, which is far more common in studios and evening classes. The speed of rotation is controlled by a foot pedal, much like the accelerator in a car, and learning to manage that speed smoothly is one of the first skills you will develop.
The wheel spins in an anticlockwise direction in the UK and most of Europe, though it is worth knowing that in Japan and some other countries, wheels spin clockwise. This matters because the direction affects how you position your hands and apply pressure. If you ever follow a video tutorial online, always check which direction the presenter’s wheel is spinning before copying their hand positions.
Kick wheels – where you use your foot to keep a large flywheel turning – are still used in many traditional studios, particularly in craft schools and rural pottery workshops. They are slower and more meditative, and some potters love them passionately. However, for learning purposes, an electric wheel gives you more consistent control while you are still figuring out the fundamentals.
Finding a Class or Studio Near You
Before buying any equipment, the single most useful thing you can do is find a beginner’s class. Pottery is one of those crafts that genuinely benefits from in-person instruction, at least initially. Having a teacher correct your hand position or show you exactly how much pressure to apply makes an enormous difference – written descriptions and videos can only go so far.
Across the UK, there are excellent options at various price points. Many local councils and further education colleges run evening classes through their adult learning programmes – these are often subsidised and very affordable. Community pottery studios such as Turning Earth in London operate on a membership model, offering both classes and open-access studio time. In Scotland, organisations like Creative Scotland help fund craft education programmes, and many independent potters run small group workshops from their own studios.
The Craft Pottery Charitable Trust and the Craft Potters Association (CPA) are both UK-based organisations worth knowing about. The CPA in particular has a long history in British ceramics and their website includes a directory of member potters and studios across the country. If you are looking for a reputable class, checking whether the tutor has CPA membership or connections is a reasonable indicator of their seriousness about the craft.
Most beginner courses run for six to eight weeks, with sessions of two to three hours. That is usually enough time to get comfortable with centring, throw a few basic forms, and understand the firing and glazing process at a surface level. Do not expect to produce beautiful work in the first few sessions – expect, instead, to learn a great deal and enjoy the process regardless of the results.
What You Will Need to Get Started
If you are attending a class, the studio will provide clay, tools, and wheel time. You will need very little of your own kit to begin with. That said, there are a few things worth having:
- An apron. Pottery is genuinely messy. A decent apron – preferably one that covers your lap when seated – will save your clothes. Leather aprons are popular among working potters, but a thick canvas apron works perfectly well for beginners.
- Old clothes and shoes. Even with an apron, clay has a way of finding its way everywhere. Wear things you do not mind getting dirty.
- A sponge and a small bowl of water. Most studios supply these, but having your own small natural sponge is useful for keeping your clay moist and cleaning up your work as you go.
- A wire tool. This thin wire with wooden handles is used to cut your finished pot off the wheelhead. Studios provide them, but they are inexpensive (usually under £5) and worth owning.
- A basic trimming tool. Once you move beyond your first few sessions, a simple loop or ribbon tool for trimming the base of your pots becomes useful. Again, most studios supply these.
- A notebook. This one is optional but strongly recommended. Jot down what clay body you used, what glaze you applied, and what firing temperature it went through. You will forget otherwise, and that information becomes invaluable as you develop your practice.
For UK-based beginners looking to buy their own tools, suppliers such as Bath Potters’ Supplies, Potclays in Staffordshire, and Scarva Pottery Supplies in Northern Ireland all stock beginner kits and individual tools at reasonable prices. Buying a simple beginner’s tool kit – typically containing a sponge, wire, wooden ribs, and a few trimming tools – costs between £15 and £30 and will last you a very long time.
Choosing Your Clay
Not all clay is the same, and the type of clay you use matters more than beginners often realise. In the UK, the most common clay bodies for wheel throwing are earthenware, stoneware, and porcelain.
Earthenware is the most forgiving and the easiest to work with. It fires at lower temperatures (around 1000-1150°C), remains relatively pliable on the wheel, and is widely available. Red earthenware, in particular, is a staple of UK pottery classes. Stoneware is denser and fires at higher temperatures (1200-1300°C), producing stronger, more durable pieces. It is slightly less forgiving than earthenware but is widely used by working potters for functional ware. Porcelain is beautiful and translucent when fired thin, but it is notoriously difficult to throw – slippery, prone to collapsing, and unforgiving of technique errors. It is absolutely not recommended for beginners.
Most beginner classes in the UK use a smooth stoneware or a grogged earthenware (grogged means the clay contains small particles of fired clay that add texture and structural strength). Your teacher will usually specify which clay to use, and it is worth following their recommendation rather than experimenting until you have a solid grounding in the basics.
The Core Stages of Wheel Throwing
Throwing a pot on the wheel involves a sequence of distinct stages. Each one must be done in order, and each one affects the quality of everything that comes after it. Rushing through centring to get to the “interesting” part of pulling walls is one of the most common beginner mistakes – and one of the most costly.
1. Wedging
Before clay ever touches the wheel, it must be wedged. Wedging is the process of working the clay with your hands to remove air bubbles and create an even consistency throughout the block. Air bubbles trapped in clay can cause pots to crack or even explode during firing, so this step is non-negotiable. There are two common wedging techniques – rams-head wedging and spiral wedging – and your teacher will demonstrate both. Spiral wedging, once mastered, is faster and more effective, but rams-head wedging is easier for beginners to learn initially.
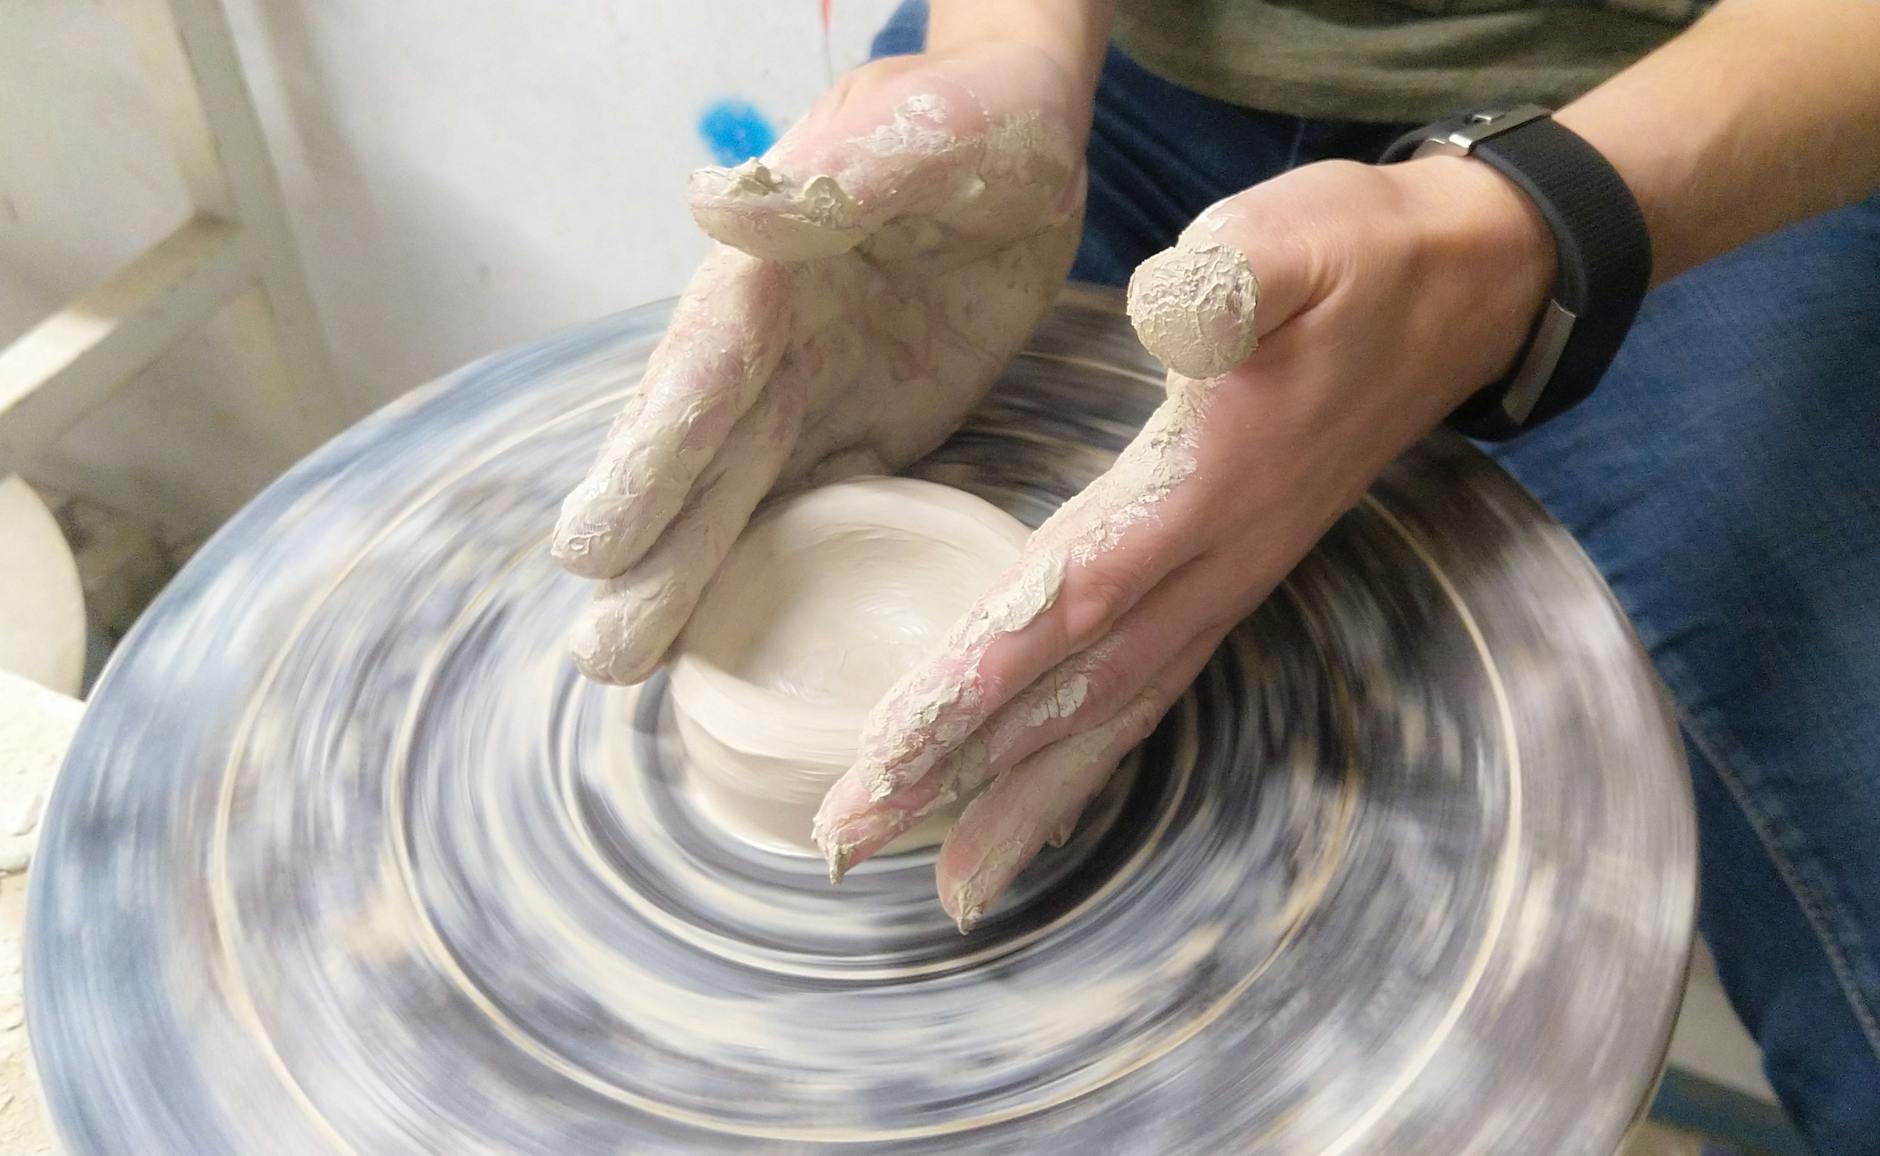
2. Centring
This is the stage that most beginners find most frustrating, and it is also the most important. Centring means getting your ball of clay rotating perfectly in the middle of the wheelhead, with no wobble or eccentricity. The wheel spins fast – usually somewhere between medium and high speed for centring – and you use firm, controlled pressure with both hands to push the clay into a smooth, even dome.
The key to centring is using your whole body, not just your hands. Brace your elbows against your thighs or the edge of the wheel tray. Keep your hands wet. Apply steady, consistent pressure rather than short, stabbing pushes. And breathe – tension in your arms transfers directly to the clay, making it harder to control. It takes most beginners several sessions before centring starts to feel reliable, and that is completely normal.
3. Opening
Once your clay is centred, you open it – creating the base of your pot by pressing down into the middle of the dome with your thumbs or fingers. You push down to just above the floor of the wheelhead (leaving a thin base) and then draw outward to create the interior floor width of the pot. Keep the wheel spinning at a medium speed for this stage.
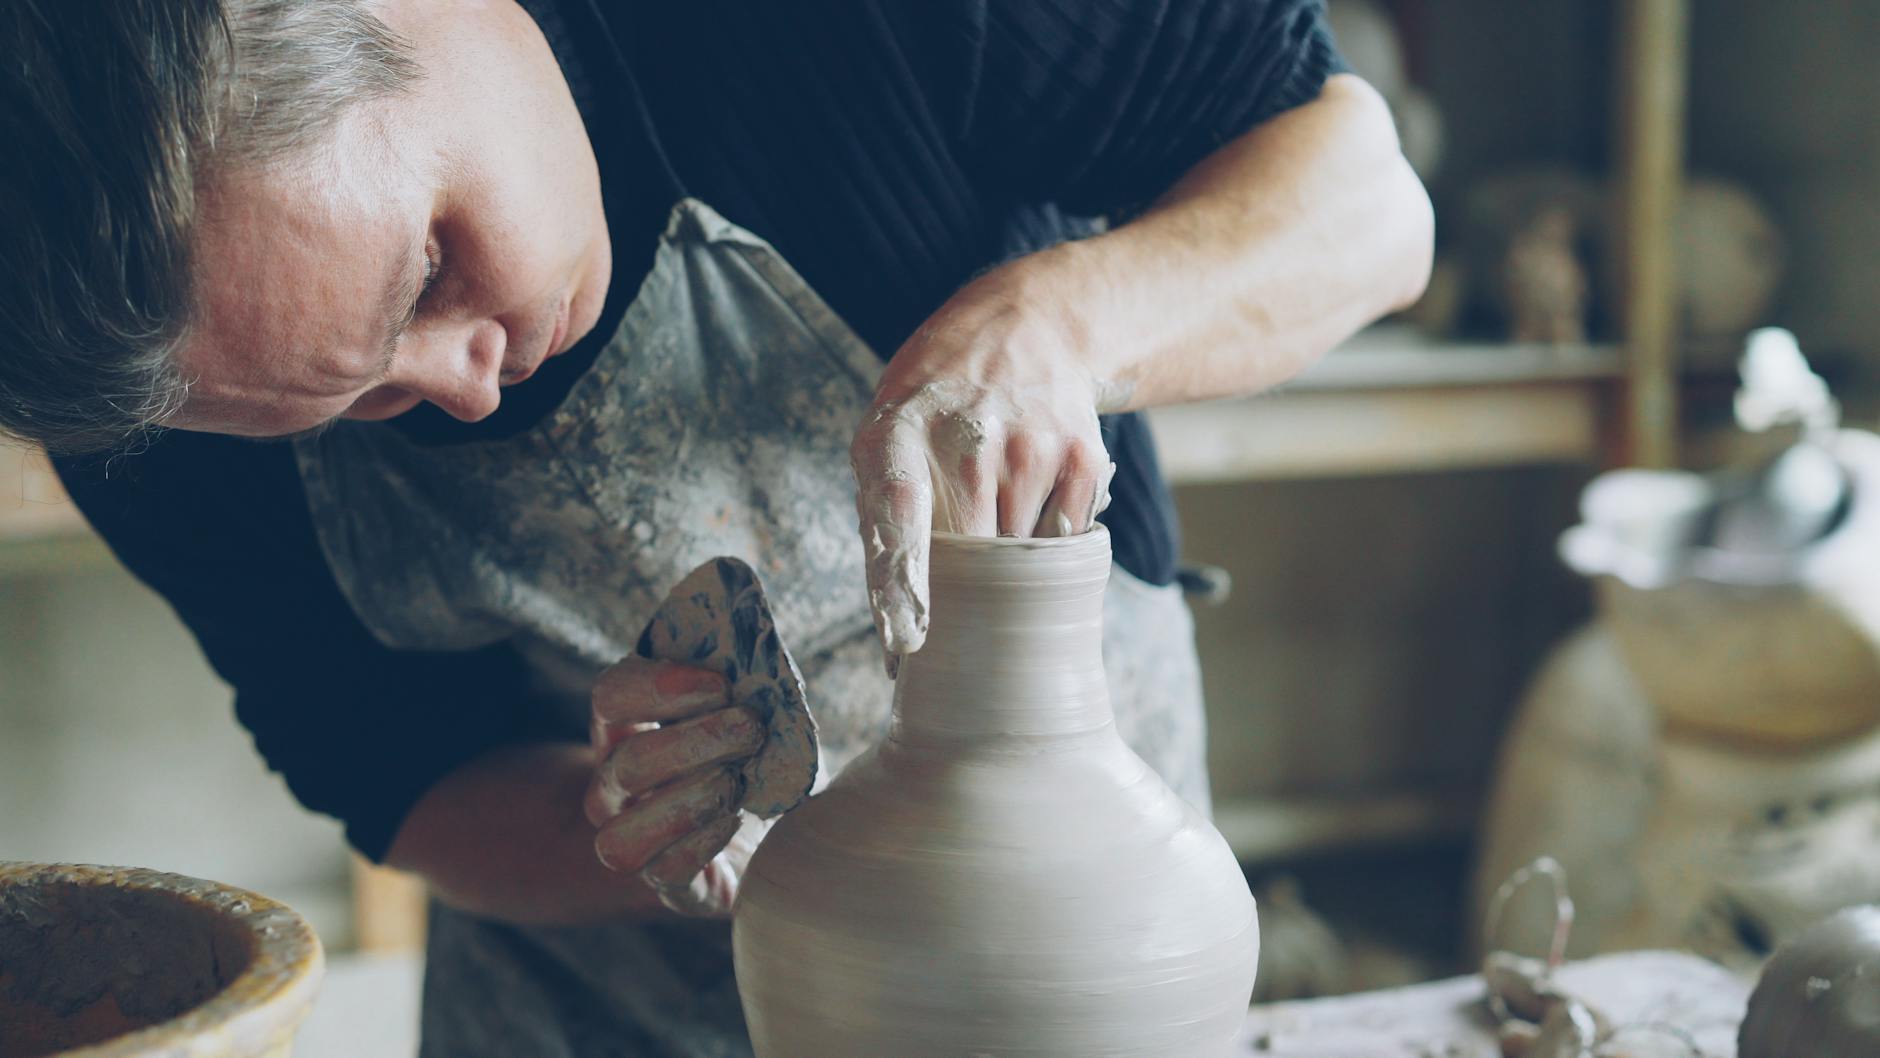
4. Pulling the Walls
This is the stage that feels most like “making a pot.” With one hand inside the form and one outside, you squeeze gently and draw upward – pulling the walls of the pot taller with each pass. The wheel should be spinning at a medium speed. Each pull thins and raises the walls slightly, and three to five pulls is usually enough for a simple cylinder. The key is to use equal pressure from both hands, move
steadily upward, and avoid gripping too tightly. Rushing this stage is the most common mistake beginners make, and it almost always results in the walls twisting or collapsing.
As the walls rise, you may notice the rim becoming uneven. This is entirely normal. Use a gentle pinching motion at the top of the form to keep the rim level as you work. Some potters choose to trim away any very ragged edges with a needle tool whilst the clay is still on the wheel. It is also worth remembering that wet clay is forgiving — if a wall begins to lean, a calm supporting hand on the outside can often correct it before the form is lost entirely. Keep a bowl of water nearby and wet your hands frequently; dry hands drag against the clay and create friction that works against you.
Once you are satisfied with the height and thickness of your walls, slow the wheel and use a smooth, damp sponge to refine the interior base and remove any excess water that has pooled there. Standing water left inside a pot will weaken the base as it dries. You can then use a wooden rib or a metal kidney tool against the outer wall to compress and smooth the surface, which also strengthens the clay body. At this point your basic cylinder is complete, and from here you can choose to shape it further into a bowl, a jug, or simply leave it as it is.
Conclusion
Throwing on the wheel is a skill that rewards patience above all else. The techniques described here — centring, opening, and pulling — form the foundation of everything you will make at the wheel, and returning to practise them in isolation is never wasted time. Every potter, regardless of experience, has sessions where the clay simply will not cooperate, and learning to recognise when to stop, reclaim the clay, and begin again is as important as any hand technique. With consistent practice and a willingness to work slowly, most beginners find that a reliable, usable cylinder is well within reach after a handful of sessions.