
Hand Building Pottery Techniques for Beginners
Hand building is one of the easiest and most satisfying ways to start making pottery at home. You do not need a wheel, a large studio, or years of training to make useful and attractive ceramic pieces. With a few basic tools, some suitable pottery clay, and a bit of patience, you can make bowls, mugs, plant pots, candle holders, decorative dishes and more. For beginners in the UK, hand building is often the most practical entry point into ceramics because it works well in small spaces, suits different budgets, and allows plenty of freedom in shape and style.
In this guide, you will find the main hand building pottery techniques explained clearly, along with advice on choosing clay in the UK, using simple tools, drying work properly, and getting pieces fired. Whether you want to join a local pottery class, work from a kitchen table, or build skills before trying wheel throwing, hand building gives you a solid foundation in ceramics.
What is hand building in pottery?
Hand building is the process of shaping clay by hand rather than using a potter’s wheel. There are three core methods most beginners learn first:
- Pinch pots
- Coil building
- Slab building
These methods can be used on their own or combined in one piece. For example, you might make a pinch pot base and add coil-built walls, or build a slab mug and attach a pulled or rolled handle. Hand building is popular because it is approachable, forgiving, and well suited to both functional pottery and sculptural work.
In the UK, hand building has a strong place in community studios, adult education classes, school art departments and independent ceramic workshops. Many beginners start with stoneware or earthenware clay and use shared kilns at local pottery studios, ceramic cafés or firing services.
Why hand building is ideal for beginners
If you are new to pottery, hand building has several advantages over learning on the wheel straight away.
- It is cheaper to begin because you need fewer tools and no wheel.
- It gives you a better feel for clay structure and moisture levels.
- It is easier to work at your own pace.
- You can make a wide range of forms without specialist equipment.
- It suits small home set-ups, as long as you can manage clay dust safely.
It also teaches useful habits that carry across all forms of ceramics, such as wedging clay, joining pieces securely, controlling thickness, and allowing work to dry evenly. These basics matter whether you plan to make rustic bowls, contemporary homewares, or more decorative ceramic art.
Choosing pottery clay in the UK
One of the first questions beginners ask is which clay to buy. In the UK, the most common choices for hand building are earthenware, stoneware and porcelain, though porcelain is usually best left until later because it can be trickier to handle.
Earthenware clay
Earthenware is a good starting point for beginners. It is often softer, easy to shape, and usually fired at lower temperatures. It is widely used in schools and beginner classes. Terracotta is a familiar type of earthenware clay, with its warm red or orange colour. It works well for plant pots, decorative ware and rustic pieces.
Stoneware clay
Stoneware is another excellent option and is especially popular in UK studio ceramics. It fires at a higher temperature than earthenware and tends to be durable and versatile. Many people prefer stoneware for mugs, bowls and tableware because of its strength and practical finish.
Porcelain clay
Porcelain can produce beautiful, refined pieces, but it is less forgiving. It dries quickly, shows marks easily and can warp more readily. Beginners are often better off learning basic technique with earthenware or stoneware first.
Air-dry clay or proper pottery clay?
It is important to know the difference. Air-dry clay can be useful for crafts and practice, but it is not the same as ceramic clay and cannot be kiln fired in the same way. If you want durable ceramics with glaze and a true pottery finish, choose proper pottery clay intended for firing.
Where to buy clay in the UK
There are many reliable ceramic suppliers across the UK that sell clay suitable for beginners, often in manageable bag sizes. Local pottery studios may also sell clay bodies they already fire in-house, which can make life easier if you plan to use their kiln service. When buying, check:
- Firing temperature range
- Whether it suits hand building
- Whether it contains grog or sand for strength
- Compatibility with available glazes and kiln services
A lightly grogged stoneware clay is often a sensible beginner choice for hand building because it has more structure and is less likely to slump.
Basic tools and materials
You do not need a big kit to start. Many beginners are surprised by how much can be done with a few simple items.
- Pottery clay
- A smooth work surface or canvas board
- Rolling pin or slab roller substitute
- Wooden modelling tools
- Metal or rubber kidney scraper
- Sponge
- Wire clay cutter
- Needle tool or skewer
- Small container of water
- Old credit card or rib tool
- Plastic bags for covering work
At home, keep your set-up simple and tidy. Avoid creating dry clay dust, which should not be inhaled. Clean surfaces with a damp sponge rather than sweeping. If you plan to work regularly, it is worth setting aside a dedicated area and storing clay in airtight containers or sealed bags.
Preparing clay before you start
Before making anything, it helps to prepare the clay properly. This usually means wedging, which is the process of kneading clay to make the texture even and reduce trapped air. While tiny air bubbles are not always disastrous in hand-built work, good preparation improves consistency and reduces weak spots.
You should also think about thickness. Beginners often make pieces too thick because thicker clay feels safer. In reality, overly thick walls dry unevenly, become heavy, and may crack. Aim for steady, even walls unless a thicker section is structurally necessary. For many hand-built forms, around 6mm to 10mm is a useful range, depending on the piece.
Pinch pot technique
The pinch pot is often the first hand building method taught in UK pottery classes, and for good reason. It gives you an immediate feel for how clay responds to pressure. It also forms the basis for many other projects.
How to make a pinch pot
- Roll a piece of clay into a smooth ball.
- Press your thumb into the centre, leaving enough clay at the base.
- Gently pinch the walls between thumb and fingers while slowly rotating the form.
- Even out the thickness as you go, avoiding weak spots.
- Refine the rim and smooth the surface with fingers or a damp sponge.
The key is to work gradually rather than forcing the shape too quickly. If the clay starts to feel floppy, let it firm up for a short time before continuing.
What can you make with pinch pots?
- Small bowls
- Tea light holders
- Salt cellars
- Mini planters
- Animal figures and sculptural forms
You can also join two pinch pots together to create a hollow form, such as a small vase or decorative object. To join pieces, score both surfaces, add slip, press together firmly and smooth the seam. Scoring means scratching the clay surface so the join grips properly, and slip is simply clay mixed with water to create a glue-like consistency.
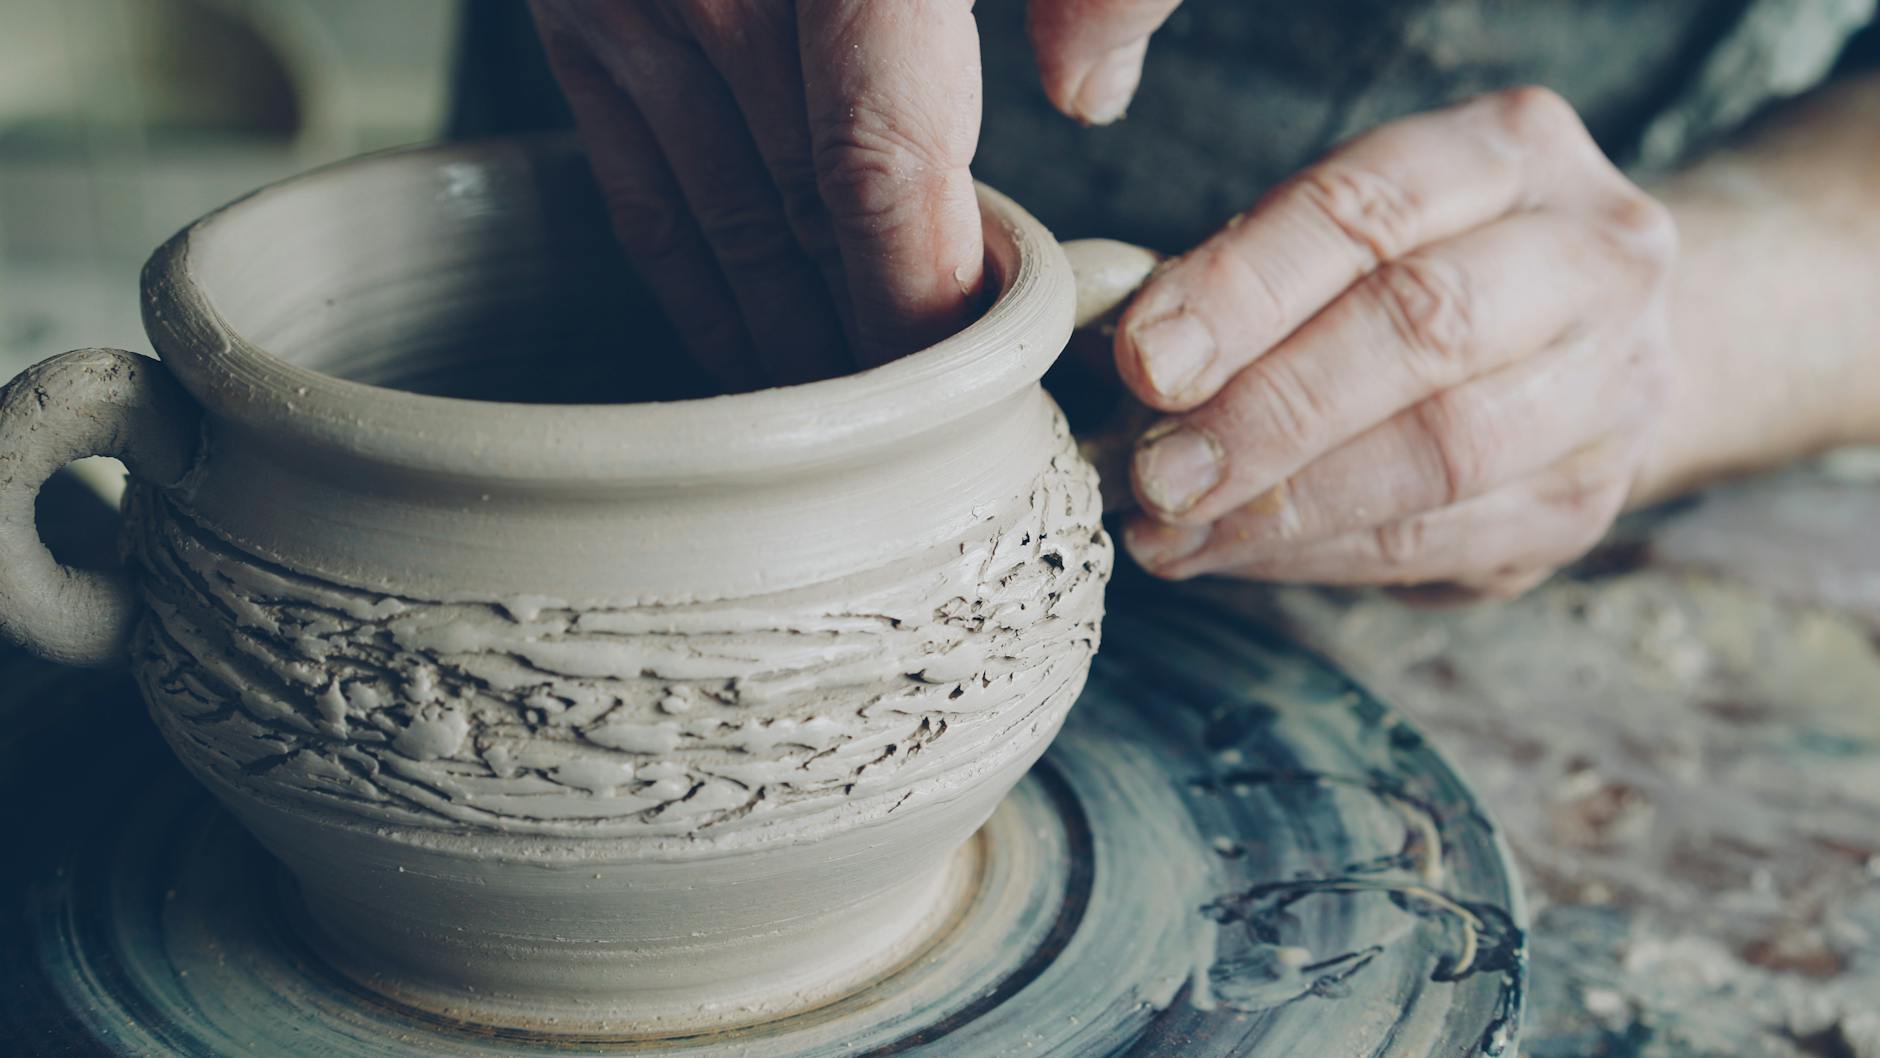
Coil building technique
Coil building is one of the oldest pottery methods and remains one of the most versatile. It involves rolling clay into long rope-like coils and layering them to build height and shape. This technique is excellent for beginners because it helps you understand how walls are supported and how clay behaves as it grows taller.
How to make coil pottery
Start with a base, which can be a pinch pot base, a rolled slab, or a flattened disc of clay. Then roll coils of even thickness on your work surface. Attach the first coil to the base using score and slip. Add more coils one at a time, blending or compressing them as needed.
You can leave the coil texture visible for a more handmade look, or smooth the inside and outside for a cleaner finish. Keep checking the shape from all angles, as pots can drift off-centre surprisingly quickly.
Tips for better coil-built pots
- Keep coils consistent in thickness.
- Do not add too much height at once if the clay is soft.
- Compress each coil into the one below to avoid weak joins.
- Use a rib tool to smooth gradually rather than soaking the clay with water.
- Let the form firm up between stages if needed.
Coil building works well for larger plant pots, vases, fruit bowls and sculptural pieces. In UK home pottery circles, it is a favourite method for people who want a relaxed making process without the need for expensive equipment.
Slab building technique
Slab building uses rolled-out sheets of clay to make forms with flat or gently curved surfaces. It is especially useful for mugs, trays, boxes, lanterns and modern geometric designs. If you like neat edges and more structured shapes, slab building may become your favourite method.
How to roll even slabs
Use a rolling pin with guide sticks on either side if possible. This helps create a consistent thickness. Rotate the clay as you roll and lift it occasionally so it does not stick. If the clay is very soft, leave it to firm up slightly before cutting shapes.
Common slab projects for beginners
- Rectangular trays
- Small dishes
- Cups and beakers
- Wall pockets
- Decorative tiles
Joining slab pieces
Good joins are essential. Score both edges well, apply slip, and press together carefully. Then reinforce the joint if needed with a small coil blended into the seam. This is particularly helpful for functional pieces that need strength, such as mugs or planters.
One common beginner mistake is assembling slabs while they are too wet. Soft slabs tend to slump, stretch and lose their edges. It is often better to wait until they reach a firmer leather-hard stage before constructing the piece.
Decorating hand-built pottery
Decoration can be simple or detailed, but it should suit the piece and the stage of drying. Hand-built pottery responds well to texture and surface pattern.
Easy decoration methods
- Pressing lace, leaves or textured fabric into the clay
- Carving lines or patterns
- Applying slip decoration
- Adding handles, feet or small sculpted details
- Using stamps or found objects for repeated marks
For beginners, it is often best to start with clean, well-made forms and one or two decorative ideas rather than trying everything at once. A neat shape with subtle texture usually looks better than a complicated design with structural issues.
Drying your pottery properly
Drying is one of the most overlooked parts of ceramics, yet it often determines whether a piece survives to firing. Clay shrinks as it dries, and if one area dries much faster than another, cracking can happen.
In the UK, weather and indoor heating can affect drying rates quite a bit. A centrally heated room in winter may dry rims and handles too fast, while a cool damp room may slow everything down. Try to dry work gradually under loose plastic, especially in the early stages.
Stages of clay drying
- Wet: soft and very workable
- Leather hard: firmer, good for trimming and attaching certain parts
- Bone dry: completely dry, ready for bisque firing
Handles, rims and thin attachments are especially vulnerable. Cover these areas if they are drying faster than the rest. Turn pieces occasionally so air reaches all sides evenly. Patience at this stage saves a lot of frustration later.
Firing and glazing in the UK
If you are making pottery at home, the biggest practical hurdle is firing. Very few beginners start with their own kiln, so most rely on local studios, ceramic workshops or community kiln services. This is common throughout the UK and often the easiest route.
Bisque firing
The first firing is called the bisque firing. It turns the clay from fragile greenware into a hard, porous ceramic that can be handled and glazed more easily.
Glaze firing
After bisque firing, you can apply glaze and fire the piece again. The exact temperature depends on the clay and glaze. It is important to use a clay body and glaze that suit the same firing range.
Questions to ask a UK firing service
- What clay bodies do they accept?
- Do they require you to buy clay from them?
- What cone or temperature do they fire to?
- Do they allow outside glazes?
- How are pieces priced for firing?
- Are they suitable for food-safe ware?
Many studios have their own rules to protect kilns from unsuitable materials, so always check before making a whole batch of work.
Common beginner mistakes and how to avoid them
Everyone makes a few wobbly bowls and cracked pots at the start. That is normal. Still, a handful of issues come up again and again.
- Walls are too thick or uneven
- Joins are rushed and not scored properly
- Too much water is used, making the clay weak
- Pieces are dried too quickly
- Handles are attached at the wrong moisture stage
- The base is compressed poorly and later cracks
The good news is that these problems are usually fixable with practice and attention. Slow down, check thickness often, compress joins well, and give pieces time to rest between stages. Taking photos of your work before firing can also help you spot shape issues and track progress over time.
Best beginner projects to try first
If you are unsure where to begin, choose projects that teach one technique clearly and do not need complex assembly.
- Pinch pot bowl
- Coil-built planter
- Slab trinket dish
- Textured wall tile
- Simple cup without a handle
Handle-free cups are often easier than mugs because handles can crack or pull away if attached carelessly. Plant pots and decorative dishes are also forgiving choices for early projects.
Learning pottery in the UK
One of the best things about taking up ceramics in the UK is the range of learning options available. You do not have to work everything out on your own.
- Adult education courses
- Community pottery studios
- Private ceramic workshops
- Evening classes at art centres
- Short courses with local potters
A class can speed up your progress because you get access to tools, clay advice, firing facilities and feedback on technique. It also helps you understand practical matters such as clay recycling, glaze safety and kiln preparation. If you prefer learning at home, online courses and pottery books can be useful, but try to combine them with occasional in-person support if possible.
Setting up a simple home pottery routine
For many beginners, consistency matters more than having a perfect space. A small table, a wipe-clean surface and a box of tools are enough to start. Try working on one project from start to finish rather than making lots of half-finished pieces. This teaches you how clay changes from wet to leather hard to bone dry.
It can also help to keep notes on:
- Which clay you used
- How thick the piece was
- When parts were joined
- How long it dried for
- Which glaze and firing temperature were used
This might sound a bit formal, but it makes improvement much easier, especially once you start repeating forms and developing your own style.
Final thoughts
Hand building pottery is a brilliant way to begin working with ceramics in the UK. It is accessible, creative and flexible enough to suit all sorts of goals, from casual home crafting to serious studio practice. By learning pinch pots, coil building and slab construction, you can make a wide range of ceramic pieces while building sound technical habits from the start.
The most important things are choosing the right pottery clay, keeping thickness even, making strong joins and drying work slowly. Beyond that, progress comes through repetition. Your first bowl may be slightly lopsided and your first mug may not survive firing, but each piece teaches you something useful. That is part of the pleasure of ceramics. Clay has a way of showing you exactly where you need to improve, while still giving you plenty of room to enjoy the process.
If you are curious about pottery clay and ceramics in the UK, hand building is one of the best places to start. With a small kit, a bit of space and a willingness to practise, you can begin making pieces that are not only personal and expressive, but genuinely practical too.


https://shorturl.fm/1GRzr
https://shorturl.fm/7a33J
https://shorturl.fm/hP8iW
https://shorturl.fm/Q7zej
https://shorturl.fm/dm4ED
https://shorturl.fm/onZkj
https://shorturl.fm/MX0Lz
https://shorturl.fm/zhLmc
https://shorturl.fm/20EYo
https://shorturl.fm/lBXMG
https://shorturl.fm/XQ8vh
https://pesnimp3.net/2.html
https://shorturl.fm/sqRPC
https://pesnimp3.net/1.html
https://shorturl.fm/u2iI3
https://pesnimp3.net
https://shorturl.fm/onChL
https://shorturl.fm/5PYMQ
https://shorturl.fm/snufQ
https://shorturl.fm/tfZjE
https://shorturl.fm/OveS9
https://shorturl.fm/oFtne
https://shorturl.fm/irsQI
https://shorturl.fm/LrYTl
https://shorturl.fm/beZrQ
https://shorturl.fm/c4t3F
https://shorturl.fm/rj8mq
https://shorturl.fm/EvNwR
https://shorturl.fm/q6TWR
https://shorturl.fm/r45Eu
https://shorturl.fm/RFFGF
https://shorturl.fm/XTJqX
https://shorturl.fm/hJzXq
https://shorturl.fm/NZirx
https://shorturl.fm/4tnoP
https://shorturl.fm/k6AmH
https://shorturl.fm/jzfFW
https://shorturl.fm/FsQE7
https://shorturl.fm/BxaIv
https://shorturl.fm/jRyRa
https://shorturl.fm/rf6Gx
https://shorturl.fm/vDFEi
https://shorturl.fm/Z3OlD
https://shorturl.fm/HVF2t
https://shorturl.fm/NEsvX
https://shorturl.fm/MF9rn
https://shorturl.fm/0cJ87
https://shorturl.fm/u2r2H
https://shorturl.fm/yQGft
https://shorturl.fm/ACFlM
https://shorturl.fm/jIZF3
https://shorturl.fm/GpvXD
https://shorturl.fm/H8dK7
srtdyfwmregxoquqphqgweoxhitohp
https://shorturl.fm/ppvGu
Новинки музыки 2026 скачать бесплатно https://shorturl.fm/tunN9
https://shorturl.fm/hAtjf
https://shorturl.fm/MC47B
https://shorturl.fm/hnZaO
https://shorturl.fm/evQFG
https://shorturl.fm/cHcs1
https://shorturl.fm/Nqrb3
https://shorturl.fm/cfmGR
https://shorturl.fm/p9aEQ
https://shorturl.fm/QDbco
https://shorturl.fm/BQF3O
https://shorturl.fm/gtKOV
https://shorturl.fm/EMlIH
https://shorturl.fm/eBCcT
https://shorturl.fm/Cut0b
https://shorturl.fm/uygkK
https://shorturl.fm/5yxgk
Новинки музыки 2026 скачать бесплатно https://shorturl.fm/pj0rJ
Последние новинки музыки 2026 скачать бесплатно – https://shorturl.fm/rrdv9
Последние новинки музыки 2026 скачать бесплатно – https://shorturl.fm/rrdv9
https://shorturl.fm/aSjWQ
https://shorturl.fm/dxTO3
https://shorturl.fm/hYR66
https://shorturl.fm/96vTz
https://shorturl.fm/TByvD
https://shorturl.fm/UfJtj
https://shorturl.fm/hzhiN
https://shorturl.fm/DDohg
https://shorturl.fm/P5GTN
https://shorturl.fm/OJCZu
https://shorturl.fm/KfV4Z
https://shorturl.fm/qd4Tq
https://shorturl.fm/qd4Tq
https://shorturl.fm/qbNRL
https://is.gd/2esl83
https://is.gd/1n94DI
https://shorturl.fm/jznHh
https://shorturl.fm/0px1n
https://shorturl.fm/3s8Ll
https://shorturl.fm/TUCsj
https://shorturl.fm/N0P06
https://shorturl.fm/aXLCv
https://shorturl.fm/Dt4nb
https://shorturl.fm/BFOK9
https://shorturl.fm/AhzXT
https://shorturl.fm/GTdp9
https://shorturl.fm/Z2NEq
https://shorturl.fm/1CGxB
https://shorturl.fm/fwC1V
https://shorturl.fm/0OIYJ
https://shorturl.fm/goqHJ
https://shorturl.fm/XCCXt
https://shorturl.fm/kAFVI
https://shorturl.fm/ZUWj1
https://shorturl.fm/EIzin
https://shorturl.fm/KgfPX
https://shorturl.fm/v5p8I
https://shorturl.fm/DhK5l
https://shorturl.fm/ecFLQ
https://shorturl.fm/TeWT8
https://shorturl.fm/KQbSv
https://shorturl.fm/JlxeL
https://shorturl.fm/vT1MT
https://shorturl.fm/3aqxm
https://shorturl.fm/pokR6
https://shorturl.fm/QPDLh
https://shorturl.fm/NCSwU
https://shorturl.fm/7Bsdm
https://shorturl.fm/YXC47
https://shorturl.fm/1E23Y
https://shorturl.fm/IxXm9
https://shorturl.fm/Krbf9
https://shorturl.fm/7kHbT
https://shorturl.fm/IHMqr
https://shorturl.fm/pRwI2
https://shorturl.fm/xlr1q
https://shorturl.fm/C4dkJ
https://shorturl.fm/6scVB
https://shorturl.fm/Sss1b
https://shorturl.fm/EMPKI
https://shorturl.fm/ldmLh
https://shorturl.fm/VKfUj
https://shorturl.fm/Y2Hgc
https://shorturl.fm/aup5s
https://shorturl.fm/4gy2g
https://shorturl.fm/1vu2q
https://shorturl.fm/YU3Ol
https://shorturl.fm/P5FAC
https://shorturl.fm/ySClp
https://shorturl.fm/4gcQQ
https://shorturl.fm/06i06
https://shorturl.fm/sT02M
https://shorturl.fm/ZOJwm
https://shorturl.fm/RJie5
https://shorturl.fm/KyJ16
https://shorturl.fm/g9KOj
https://shorturl.fm/Hk0Id
https://shorturl.fm/6C16U
https://shorturl.fm/zmsJQ
https://shorturl.fm/GDRUN
https://shorturl.fm/0Ldtw
https://shorturl.fm/9z04e
https://shorturl.fm/ST3hV
https://shorturl.fm/1NCij
https://shorturl.fm/QqBvq
https://shorturl.fm/Dpdyg
https://shorturl.fm/HZMHX
https://shorturl.fm/wROA1
https://shorturl.fm/RPE1P
https://shorturl.fm/lOqTR
https://shorturl.fm/OajuF
https://shorturl.fm/KBdyK
https://shorturl.fm/Abnhp
https://shorturl.fm/vJuNZ
https://shorturl.fm/MfSIY
https://shorturl.fm/nlcYd
https://shorturl.fm/LX70e
https://shorturl.fm/CBOgB
https://shorturl.fm/BGyiY
https://shorturl.fm/STmpz
https://shorturl.fm/5yktF
https://shorturl.fm/3QoQc
https://shorturl.fm/sZC5Y
https://shorturl.fm/Um4DY
https://shorturl.fm/gAHfI
https://shorturl.fm/guMli
https://shorturl.fm/u4STK
https://shorturl.fm/ipxvu
https://shorturl.fm/UNd25
https://shorturl.fm/ZDiLg
https://shorturl.fm/H8eBJ
https://shorturl.fm/Js7Tn
https://shorturl.fm/RaE9i
https://shorturl.fm/va263
https://shorturl.fm/5BXY7
https://shorturl.fm/BXP7l
https://shorturl.fm/xRQtr
https://shorturl.fm/O7Zx6
https://shorturl.fm/qVyup
https://shorturl.fm/iQtXM
https://shorturl.fm/Qy9AJ
https://shorturl.fm/DQjfN
https://shorturl.fm/R4D2y
https://shorturl.fm/9D7z7
https://shorturl.fm/uwYwZ
https://shorturl.fm/OXFZN
https://shorturl.fm/E84BH
https://shorturl.fm/APs6m
https://shorturl.fm/U5UvI
https://shorturl.fm/CtTno
https://shorturl.fm/9c7o2
https://shorturl.fm/jofxk
https://shorturl.fm/31V6g
https://shorturl.fm/d2z0K
https://shorturl.fm/cq301
https://shorturl.fm/KQtKw
https://shorturl.fm/lcgOc
https://shorturl.fm/cZJEQ
https://shorturl.fm/xfYRe
https://shorturl.fm/jJmkr
https://shorturl.fm/q1Anl
https://shorturl.fm/7Eyaq
https://shorturl.fm/p9Cv9
https://shorturl.fm/Wb0P5
https://shorturl.fm/jGn0M
https://shorturl.fm/OtNrX
https://shorturl.fm/sIU0P
https://shorturl.fm/SpaYD
https://shorturl.fm/F3ury
https://shorturl.fm/izYSm
https://shorturl.fm/n2l64
https://shorturl.fm/HmP2o
https://shorturl.fm/UvBdD
https://shorturl.fm/c0R29
https://shorturl.fm/JmSGf
https://shorturl.fm/c94qA
https://shorturl.fm/YXFJV
https://shorturl.fm/Q3sdC
https://shorturl.fm/aA26h
https://shorturl.fm/uds3s
https://shorturl.fm/xP9vs
https://shorturl.fm/hgHrT
https://shorturl.fm/GzLL9
https://shorturl.fm/KjI8a